A Step-by-Step Guide to Labelling Your Moving Boxes Efficiently
Moving can be a stressful and overwhelming experience, but efficient labelling of your moving boxes can significantly ease the process. Proper labelling helps ensure that your belongings are organised, easily identifiable, and accessible during unpacking. This step-by-step guide will walk you through the best practices for labelling your moving boxes to make your move smoother and more efficient.
Read more about our MOVING HOME CHECKLIST here
You can print our MOVING HOME CHECKLIST here.
Why Proper Labelling is Important
Before diving into the steps, it’s essential to understand why proper labelling is crucial:
- Organisation: Clearly labelled boxes help you and your movers know where each box belongs, making it easier to unload and unpack.
- Efficiency: Reduces the time spent searching for specific items after the move.
- Protection: Labels can indicate which boxes contain fragile items, ensuring they are handled with care.
- Stress Reduction: Knowing that your items are well-organised and easily locatable can significantly reduce the stress of moving.
Step 1: Gather Necessary Supplies
Before you begin labelling, make sure you have all the necessary supplies. This preparation will help you label your boxes effectively and efficiently.
Supplies Needed
- Markers: Use permanent markers in multiple colours. Fine-tipped markers are best for writing clearly.
- Labels: Purchase pre-made labels or use masking tape to create your own. Ensure they are adhesive and won’t fall off easily.
- Box Inventory Sheets: Create or print out inventory sheets to keep track of the contents of each box. You can print our MOVING HOME CHECKLIST here.
- Coloured Stickers or Tape: Use these for colour-coding boxes by room or category.
- Notebook or Digital Device: To keep a master inventory list for reference.
Step 2: Create a Labelling System
Developing a consistent labelling system is the key to efficient organisation. Your system should be simple, easy to understand, and applicable to all your boxes.
Choose Your Method
- Colour-Coding: Assign a specific colour to each room or category. For example, use red for the kitchen, blue for the bedroom, and green for the living room.
- Numbering System: Number each box and keep a detailed inventory sheet with corresponding numbers and box contents.
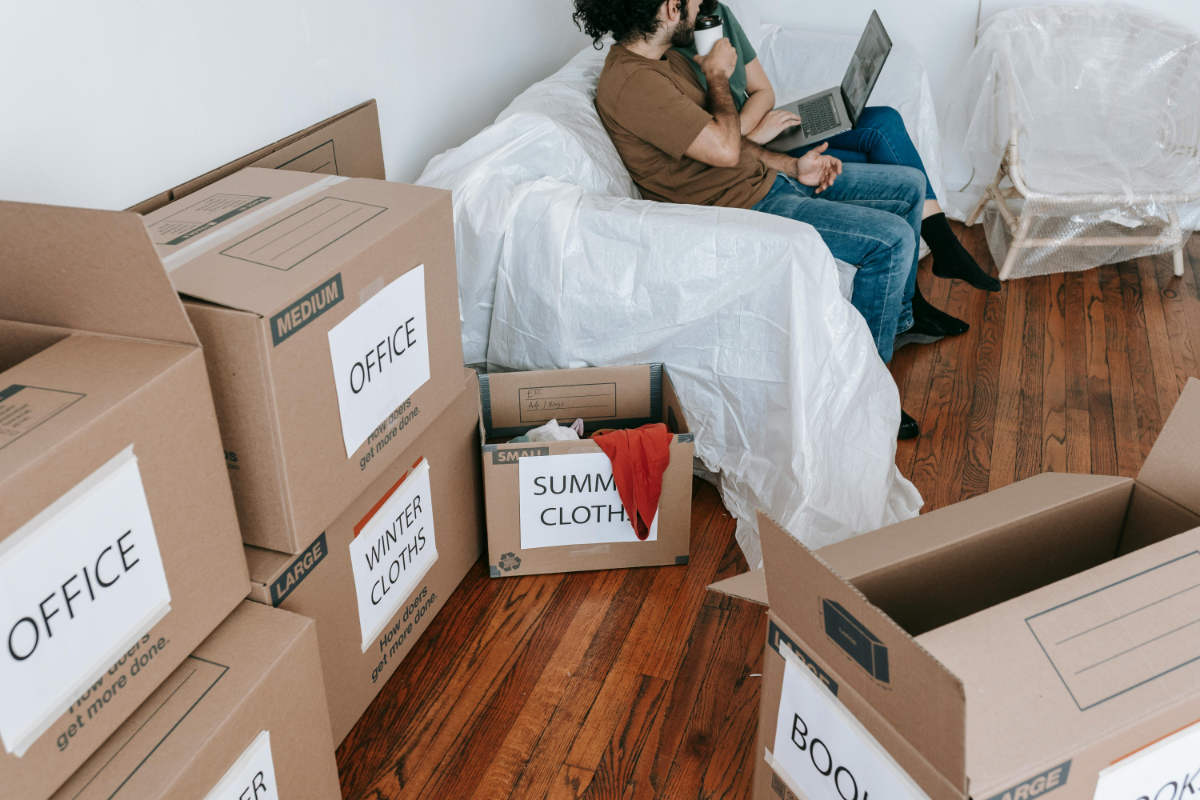
- Room Names: Write the name of the room on each box, such as “Kitchen,” “Bedroom,” or “Living Room.”
- Content Description: Include a brief description of the box contents, such as “Books,” “Kitchen Utensils,” or “Winter Clothes.”
Combine Methods for Maximum Efficiency
For the best results, combine multiple labelling methods. For example, use colour-coding for rooms, numbering for tracking, and content descriptions for detailed identification.
Step 3: Label Each Box Clearly
Once you have your labelling system in place, it’s time to label each box clearly and accurately.
How to Label
- Top and Sides: Label the top and at least two sides of each box. This ensures that the labels are visible no matter how the boxes are stacked.
- Room and Contents: Write the room name and a brief description of the contents on each box. For example, “Kitchen – Pots and Pans” or “Living Room – Books.”
- Fragile Items: Clearly mark boxes containing fragile items with “FRAGILE” in bold letters. Use coloured stickers or tape to draw attention to these boxes.
- Priority Items: Indicate priority items that need to be unpacked first with a special marker or sticker. For example, use a star or a different colour to mark boxes containing essential items like toiletries, medications, or kitchen essentials.
Step 4: Use a Master Inventory List
Keeping a master inventory list is crucial for tracking your belongings and ensuring nothing is lost during the move.
Creating the Inventory List
You can print our MOVING HOME CHECKLIST here.
- Number Each Box: Assign a unique number to each box and write this number on the box.
- Detailed List: Create a detailed list of the contents of each box, corresponding to its number. Include the room, general contents, and any special instructions (e.g., fragile).
- Digital and Physical Copies: Keep both digital and physical copies of your inventory list. Use a notebook, spreadsheet, or a moving app to manage your inventory.
Step 5: Implement Colour-Coding
Colour-coding can make the unloading process more efficient and help movers place boxes in the correct rooms.
How to Colour-Code
- Assign Colours: Assign a specific colour to each room or category. For example, yellow for the kitchen, green for the living room, blue for the bedroom, and red for the bathroom.
- Colour-Coded Labels: Use coloured labels, tape, or stickers to mark each box according to its assigned room colour.
- Colour Reference Chart: Create a colour reference chart and place it in a visible area in your new home to guide movers.
Step 6: Label Boxes for Immediate Use
Some items will be needed immediately upon arrival at your new home. Properly labelling these boxes will help you access them quickly.
Immediate Use Boxes
- Essentials Box: Pack a box with essentials such as toiletries, a change of clothes, medications, important documents, basic kitchen items, and bedding. Label this box as “Essentials” and mark it for immediate use.
- First Night Box: Prepare a box with items you’ll need for the first night, including pajamas, toiletries, phone chargers, and any other necessities. Label this box clearly.
Step 7: Involve Family Members
If you are moving with family or roommates, involve them in the labelling process. This ensures everyone knows where their belongings are and can help with the unpacking process.
Assign Responsibilities
- Individual Boxes: Assign each family member or roommate their own boxes to pack and label. This ensures that everyone’s personal items are organised according to their preferences.
- Shared Spaces: Collaborate on labelling boxes for shared spaces such as the kitchen, living room, and bathroom. This helps everyone understand where shared items are located.
Step 8: Handle Special Items with Care
Certain items require special attention during the move. Proper labelling and handling are essential to ensure these items are protected.
Special Item Categories
- Valuables and Important Documents: Pack valuable items and important documents in a separate box and keep it with you during the move. Label this box as “Valuables” or “Important Documents.”
- Electronics: Label boxes containing electronics as “Electronics” and indicate any special handling instructions.
- Fragile Items: Mark boxes with fragile items clearly and use extra padding. Write “FRAGILE” on multiple sides of the box and use coloured tape or stickers for additional visibility.
Step 9: Communicate with Your Movers
Effective communication with your moving company is crucial for a smooth move. Ensure that your movers understand your labelling system.
Brief Your Movers
- Explain Your System: Before moving day, explain your labelling system to the movers. Show them the color-coding chart and describe any special instructions for fragile or priority boxes.
- Provide a Copy of the Inventory List: Give your movers a copy of your inventory list so they know what each box contains and where it should be placed in the new home.
Step 10: Stay Organised During Unpacking
Efficient labelling not only helps with the move but also makes unpacking easier. Follow these tips to stay organized during the unpacking process.
Unpacking Tips
- Start with Essentials: Begin by unpacking the essentials and first-night boxes. This ensures you have everything you need immediately.
- Room by Room: Unpack one room at a time, following your color-coding system. This helps prevent overwhelming clutter and keeps the process manageable.
- Check Off Inventory: As you unpack each box, check it off your inventory list. This helps you keep track of your belongings and ensures nothing is missing.
Conclusion
Properly labelling your moving boxes is a crucial step in ensuring a smooth and efficient move. By following this step-by-step guide, you can reduce stress, stay organised, and make both the moving and unpacking processes more manageable. Remember to plan ahead, create a consistent labelling system, and involve your family or roommates to ensure a successful move. With the right approach, you can transform what is often a chaotic and stressful experience into a well-organised and efficient transition to your new home.
To purchase Strong Removal Boxes visit Removalboxes.co.uk
-
Product on sale 1-2 Bed Guide Removal Box PackOriginal price was: £109.99.£79.99Current price is: £79.99. (INC VAT)

-
Product on sale 2-3 Bed Guide Removal Box PackOriginal price was: £152.00.£119.99Current price is: £119.99. (INC VAT)

-
Product on sale%22%20transform%3D%22translate(.7%20.7)%20scale(1.40625)%22%20fill-opacity%3D%22.5%22%3E%3Cellipse%20fill%3D%22%23c77633%22%20rx%3D%221%22%20ry%3D%221%22%20transform%3D%22matrix(.27777%2053.04893%20-138.90502%20.72731%20116.3%20153.3)%22%2F%3E%3Cellipse%20fill%3D%22%23fff%22%20rx%3D%221%22%20ry%3D%221%22%20transform%3D%22matrix(-14.2901%20-56.47396%20247.20858%20-62.55339%20114%2025.7)%22%2F%3E%3Cellipse%20fill%3D%22%23eafeff%22%20cx%3D%22111%22%20cy%3D%22238%22%20rx%3D%22255%22%20ry%3D%2228%22%2F%3E%3Cellipse%20fill%3D%22%23fff%22%20rx%3D%221%22%20ry%3D%221%22%20transform%3D%22rotate(-8.7%20163%20-866.3)%20scale(248.93116%2040.90622)%22%2F%3E%3C%2Fg%3E%3C%2Fsvg%3E) 3-4 Bed Guide Removal Box PackOriginal price was: £210.00.£154.99Current price is: £154.99. (INC VAT)
3-4 Bed Guide Removal Box PackOriginal price was: £210.00.£154.99Current price is: £154.99. (INC VAT)
-
Product on saleBig Move Removal Box PackOriginal price was: £315.00.£239.99Current price is: £239.99. (INC VAT)